 When David was in Junior Kindergarten, one of the parents pointed him out to me and said: “That poor child is in desperate need of a haircut.” “I’ll be sure to let his mother know,” I replied. David was adamant however: no one was cutting his hair.
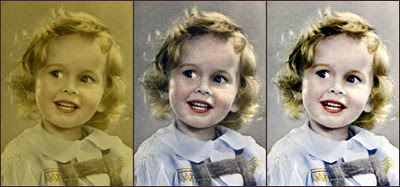
As you can see from this cute picture of John as a toddler, the Samson thing seems to be something of a tradition in our family. But the hand-tinted photo has yellowed over the years, and I wondered what Photoshop could do to restore it.
(1) First, I scanned the photo and then saved it. I reopened it in Photoshop and gave it a new file name so I could use the original again.
(2) Then I right-clicked on the Background in the Layers Palette and chose Duplicate Layer.
(3) Working on this layer (Background Copy), I used Image>Adjustments>Auto Contrast, and then Image>Adjustments>Auto Color to get it closer to the original look of the black and white photo.
(4) John looked too gray to me though, so I right-clicked on the Background Copy and chose Duplicate layer again. Now I had three layers.
(5) Working on Background Copy 2, I clicked on Linear Dodge in the drop-down Layers Palette menu and lowered the opacity to 40 per cent.
(6) John definitely looked brighter now, but a little washed out, so I merged the layers (Layer>Flatten Image), then chose Image>Adjustments>Brightness and Contrast, increasing the contrast by 17 per cent.
(7) And finally I played with Image>Adjustments>Curves to darken John slightly.
When you’re working on your own old photo, you will have to experiment with these effects to get something you’re happy with. Begin with Auto Contrast and Auto Color, and see what happens. You might discover that this is all you have to do to restore it.

1 comment:
Your step by step instructions are really useful. Fascinating to see the change on the photos. Adorable photo!!
Post a Comment