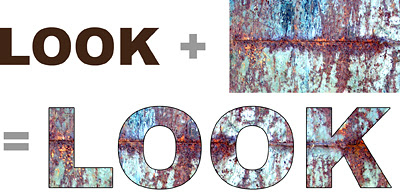
 This week I’m going to explain how to turn a photo into type. It’s a fun technique that you can use for scrapbooking pages, a simple card or even as a collage element.
1. Open a new document—5” x 2.”
2. Set the foreground color to black in the Toolbox.
3. Click on the type (T) icon in the Toolbox. Choose a chunky typeface—I used Arial Black here—and a high point size. To go above 72 pt type, you will have to set the number manually in the Options Bar just like you do the typeface. Now position your cursor and enter your word, but don’t rasterize the type.
4. Using the Move Tool, drag the photo you want to use into your new document making sure it becomes the layer above your word. (I used part of a photo I’d taken of rusted metal in my example).
5. Press Control-Alt-G (Mac: Command-Option-G) to create a clipping mask and your photo will instantly turn into type. Use the Move Tool to shift your photo around until the effect pleases you.
6. If you want to outline your word like I did here, double click on the space to the right of your word in the Layers Palette. This brings up the Layer Styles Menu and you click on Stroke. Because a Red outline is Photoshop’s default color, to change it to Black, you will have to double click on the space beside Stroke to bring up yet another menu. Click on the Color rectangle to open the Color Picker and choose Black—or another shade if you like. Sounds complicated, but once you’ve done it a couple of times you’ll get the hang of it.
Note: This effect works with Photoshop versions CS and higher. If you’re using Photoshop 6 or 7, check out Photoshop 911 for the steps you need to take to achieve this effect.

1 comment:
Thanks for the Photoshop tutorials you post!
Post a Comment