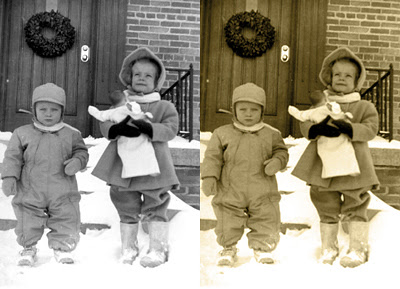
 It’s easy to add a sepia tint if you want to give a black and white photo a vintage look. There’s more than one way to do it in Photoshop, so I’ll share one of them with you today.
1. Open your photo—I chose one of my brother Robin and me—and then go to Image>Adjustments>Levels, and Brightness and Contrast to perk up your image.
2. Next, click on the New Layer Icon at the bottom of the Layers Palette.
3. Now go to the Toolbox and click on your foreground color. This brings up the Color Picker dialogue box. Choose Color Libraries and then Pantone Solid Coated (usually the default). Type 133 and this will bring up a brown swatch. Click OK.
4. Then click on the Paint Bucket in the Toolbox to fill the new layer with color.
5. Go back to the Layers Palette and choose Color from the dropdown menu to make the layer translucent.
6. Adjust the opacity in the Layers Palette to get the effect you’re after. I lowered mine to 65 per cent here.
Note: You don’t have to go with brown of course. If you want to use a different color, you can make that choice in Step 3. Instead of entering 133, click on another color swatch.

3 comments:
Thanks for the tip Susan. I always wanted to do this so I will bookmark this and try it on one of my photos. Will letcha know how it goes.
Thanks for explaining this. I never tried it this way.
This photo is really precious!
you haven't changed a bit!
Post a Comment